

 Unidata's Integrated Data Viewer > Tools

6.4 Display Settings
The Display Settings facility allows you to select a set of properties from a display control (e.g.,
color table, contouring info, isosurface value, label template, etc.) and apply them to other display
controls and/or save them as preferences to be used when creating new display controls.
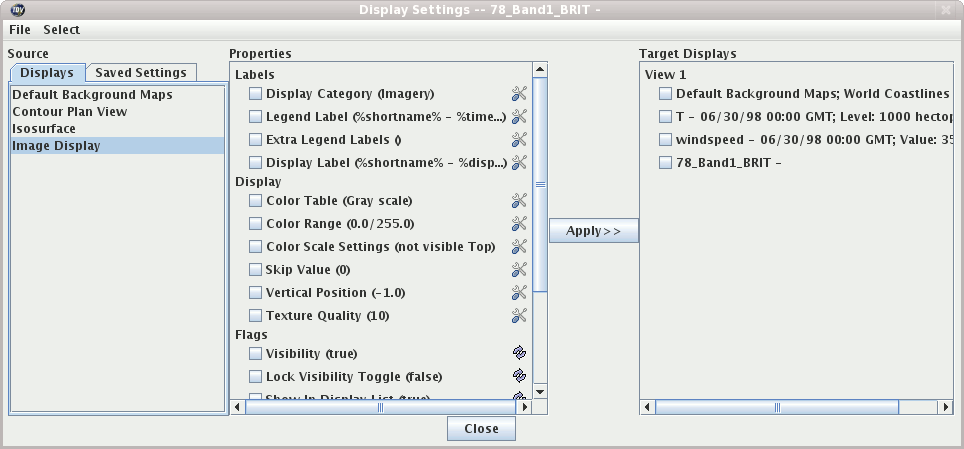
The Display Settings dialog, pictured below, can be brought up from a display control's
menu or from the main
menu bar menu.
 Image 1: Display Settings Dialog
The idea is that you can select properties in the middle panel that you want to apply to the selected target
display controls (via the checkboxes) on the right. Many of the properties can be changed
by clicking on the  buttons.
The menu is a handy way of selecting different groups of target display controls. For example,
you can select All Displays, displays of certain types, displays that have the same data sources, etc.
6.4.0 Display Settings Examples
For example, say you have two different data sources loaded with 3 or 4 displays created from each. Normally,
the legend will list all of the displays based on some display category (e.g., Plan Views). However, you want
to be able to change their display category so that each group of displays that are from one data source have the
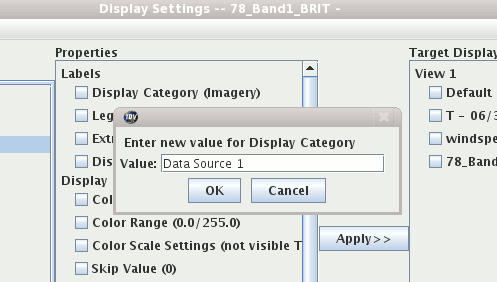
same category (e.g., "Data source 1", "Data source 2"). What you would do in this case is change the "Display Category" property
under "Labels" to "Data Source 1".
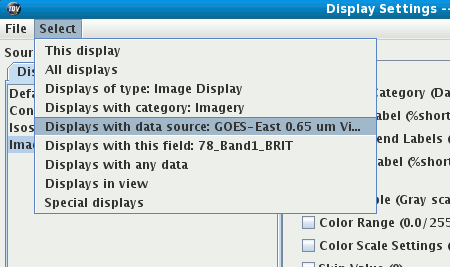
Then, you could manually select the displays you want to change but an easier way is to use the
menu and choose "Displays with data source ...":
This selects the displays with the data source of the currently selected display (on the left, highlighted in blue).
Once selected you then hit . This will set the "Display Category" property on the selected display controls.
To do the next set of displays select a new Source display control in the list on the left.
This will select this display and reset the properties list in the middle. Then when you do the
the displays that share the data source from this new display will be selected.
6.4.1 Saving Display Settings
You can save the set of selected settings with the menu. The Save Settings dialog
will be shown:
 Image 4: Save Settings Dialog
6.4.2 Using Display Settings in the Field Selector
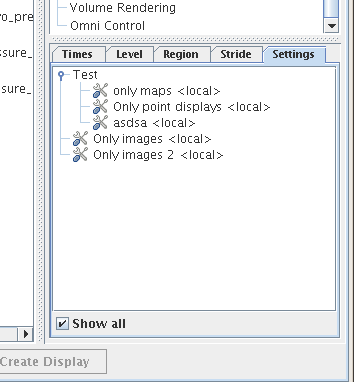
The set of saved display settings are also shown in the field selector:
 Image 5: Display Settings in Field Selector


 Unidata's Integrated Data Viewer > Tools


 buttons.


