Image 1: Bundle File Dialog


The purpose of bundles is for you to save a particular IDV setup and display. A bundle can be used for your own reference at a later time. Others using the IDV can use bundles you made to see data the same way you did.
To make a new bundle file select the File->Save As menu.
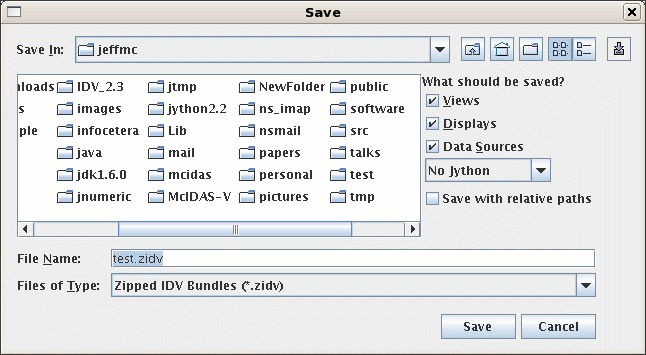
A pop-up window will let you set a new file location and name:

Note: For bundle files to work the data must be available in exactly the same way you made connection to it when you made the bundle file. Others who use your bundles must have access to the same file system or to the same remote or local data servers you use, so that file paths or URLs to the data are exactly the same.
The file dialog has a set of buttons on the right that allow you to save off (or not save off) different components of the IDV state.
Views button is related to the windows and views.
Displays button will not include any
of the created displays.
Data Sources button allows for you to not include any
of the data sources. When reading in a bundle that had been saved
without data sources and with displays the IDV will prompt the user for
the data to be used. For example, you can create a set of displays
of a gridded data set (e.g., Temperature, Relative Humidity, etc.)
This state can be saved off without the data sources. When you load this
bundle back in again the IDV will prompt the user for the required data
fields. This allows you to essentially save off a display template
that can be used for different data sets.
Jython menu allows you to save off in different
ways the Jython code you may have in your library. Say for example
you have written some custom Jython code that implements a Formula.
You have a display that uses the results of that computation.
To include your local Jython code just select All Jython
or Selected Jython. When loading in a bundle that has had
Jython code saved with it the user will be prompted for what to do
with the Jython.
Save with relative paths checkbox. The IDV
will change the file based data sources to point to the directory
where the bundle is loaded from. For example, you can use this
to save a bundle that references model files on disk. Copy the bundle
and the model files over to a thumb drive or CD. Then when you load
the bundle the files are relative to the bundle path.
Enable user to change data button, when checked, will
configure the bundle so that when it is loaded the user will be able
to change the file paths or URLS that point to data sets.
File->Open menu to open a bundle.
When loading in a new bundle you will be prompted whether the
current displays and data should be removed. You can also start up
the IDV with a bundle file or URL in the command line.
File->Default Bundle->Save menu to create a
bundle that is read whenever you start the IDV. This will provide a
standard starting configuration. You can set up the geographic area,
map projection, and maps you prefer, for example.
Favorite bundles come in 3 forms: as regular bundles, as display templates
and as favorite data sources. Each of these types of favorites can be
accessed through the Displays menu as well as through
the Dashboard.
A regular favorite bundle can be created through the File->Save As Favorite...
Displays->Favorite Bundles->Save As Favorite... menus.
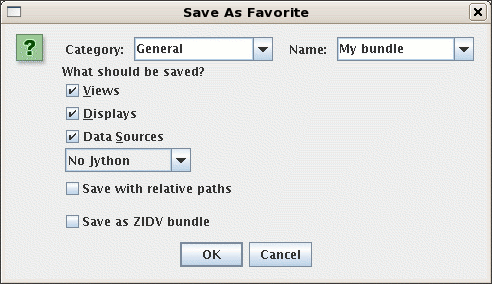
The "Save As Favorite" dialog is shown:

Category field.
Categories can be hierarchical, using a ">" as separator. For example:
"Toolbar>Weather"
The "Toolbar" category is special. These will result in links in the toolbar.
After specifying a category specify a Name for the favorite bundle.
The Display Templates favorites are created through the File->Save Display as Favorite
menu. This allows you to create a display as you like (e.g., a Contour Plan View at a certain level
with certain settings), save it off and recreate it later. Display Templates for displays that
showed data will show up in the Displays component of the Field Selector.
Data Source favorites are created through the Data Source popup menu in the Field Selector.
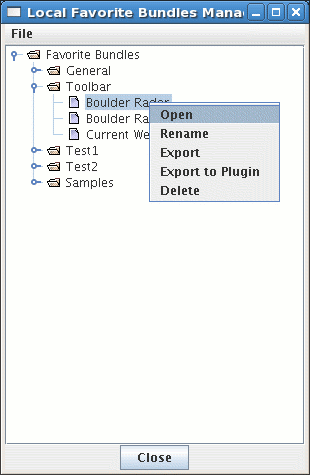
Each of these types of favorites can be with the Favorites Manager:

Displays->Favorites Bundles->Manage...,
Displays->Display Templates->Manage... and
Displays->Data Sources->Manage...
menus.
The Favorites Manager allows you to reorganize the categories and favorites
by drag-and-drop. You can also right click on a favorite or a category
to delete it, export, etc.
The IDV supports a bundle format: .zidv (or zipped idv).
This is a zip file that contains a regular bundle (xidv) and a set
of data files. When the user does a Save As... and specifies
a .zidv file extension the IDV prompts the user to select the data sources
that should be written into the zip file. On opening a zidv file
the IDV needs to unzip the data files so it prompts the user
as to where to place the files - a tmp directory or a user selected
directory (this is a preference as well).
This doesn't seem like such a big deal in and of itself but... We also have implemented a "Make Remote Data Local" facility. We can now, for most of the remote data types, move the data from the server to the local disk. We support the ADDE types: satellite, radar, point, sounding and forecast fronts. We also have support for grids on remote servers (see below).
This is used in two ways. First, the user can right click on a data source in the Field Selector and select "Make Data Local" for remote data sources. The IDV prompts for a file directory and a file prefix (we default to use the name of the data source). The remote data is then copied over. For multiple files we use: <directory><prefix><file count>.<suffix>. The data source object within the IDV is then changed to point to the new file paths.
The second way this is used is when you save off a zidv file. The user is prompted for both the local data sources to be saved off as well as for the remote data sources. For the remote ones the IDV automatically copies the files over and zips them up.
When saving gridded data the user is prompted for the fields to save and the geo-spatial subset is used to subset the grids. We do not yet support sub-setting on times and grid stride/decimation.