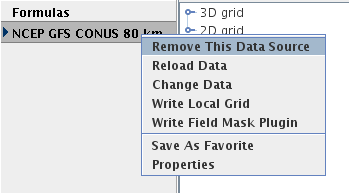


Properties:

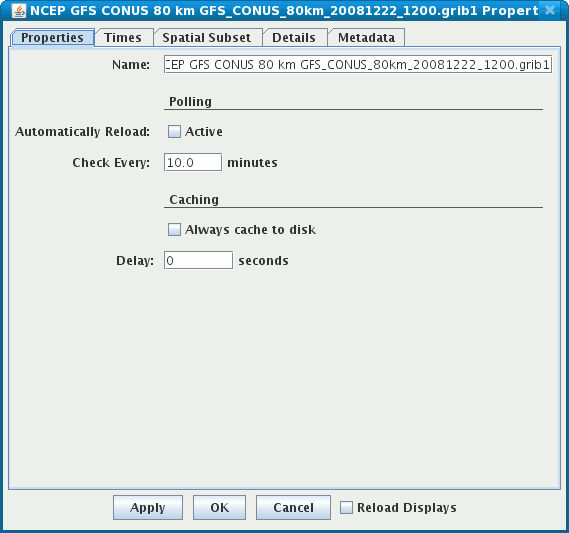
Reload Displays button. When this is selected
all data will be reloaded and the displays will be updated when the user presses
Apply or OK.
Name field.
Some data sources can automatically update themselves by selecting
the Active button. For example, if you had a set of most recent
satellite images you can turn on Polling and have the data update to the latest
images every N minutes.
For point data you can define Time Binning settings (not shown) by selecting a Bin Size (e.g., 5 minutes, 1 hour) and a Round To value (e.g., On the hour, 15 minutes after the hour). This will map all the observation times into the nearest bin. The smallest time is rounded with the Round To value (e.g., if Round To was "10 after" and the smallest time was 10:23 then this time would be rounded to 10:20). This is the base time. Each actual observation time is mapped into a set of bins of Bin Size starting at the base time.
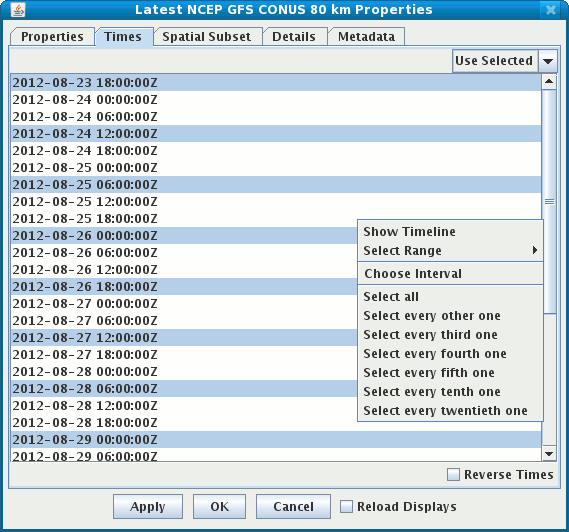
Use Default
and Use Selected. Click the drop down menu, choose the Use Selected
menu item and select individual times. You can also right mouse click in the list
to show a popup menu that allows you to select different strides (e.g., every 3rd time).
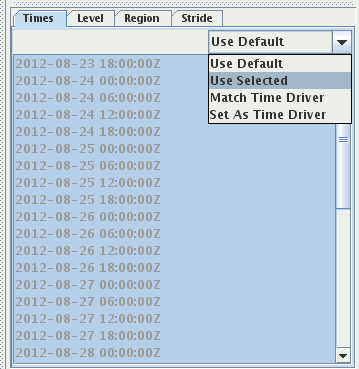
Match Time Driver and Set As TIme Driver
to allow you to use the time driver times or to set the selected times as the time driver times.
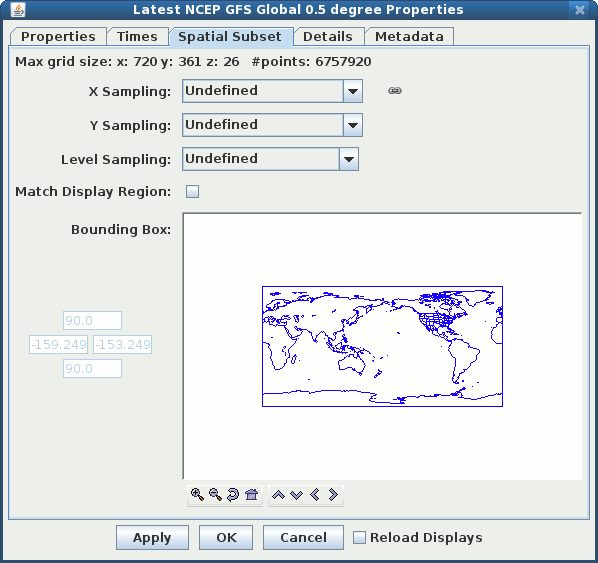
Spatial Subset tab.
The X Stride, Y Stride and Z Stride menus
allow you to decimate a grid, selecting every Nth point.
The Bounding Box allows you to define a spatial area to load.
The default spatial domain of the data is shown by the blue outline box.
To select an area just drag on the map. Once a subset is selected it can be
resized (grab on the little black selection points) moved (grab somewhere near the
box) and delete (press the Delete key).
Specific lat/lon values can be entered in the fields on the left. The Match Display Area
checkbox allows you to define a spatial subset option. By checking this option, the map area will
be disabled and this will be the default option for all the variables of this dataset.
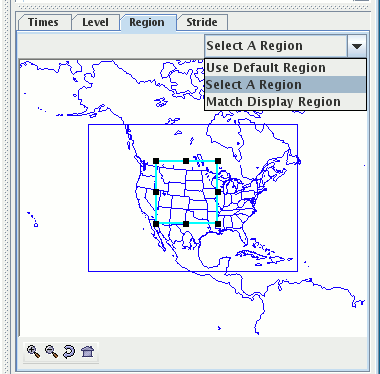
Use Default Region, Select A Region and
Match Display Region. These options allow you to use the default region, or to select a region, or to match the region
of the active view window's display area. The decimation and spatial subset are shown in different tabs:
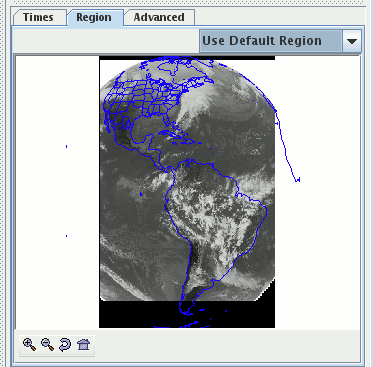
The advanced tab for the the satellite imagery allows you to override the default properties the
IDV uses to specify other aspects of the image data. The default values in the Advanced
tab reflect what is showing in the Region tab. By default, all the text fields in this
tab are disabled. To enable these text fields, you can select Select A Region in
the Region tab, all the text fields except the Magnification will be editable.
The information in the Region tab will be passed to the Advanced tab.
Any changes in the Advanced tab will also be passed back to the Region tab.
There are two different approaches to enable the Magnification widget. First, you can
un-check the Enable Adaptive Resolution checkbox in the user preferences to enable
the Magnification text field. Second, you can un-check the Enable Adaptive Resolution
checkbox in the view window Projections drop down menu. In both cases, you need to reload the
data to get the widget enable or disable if the data already loaded.
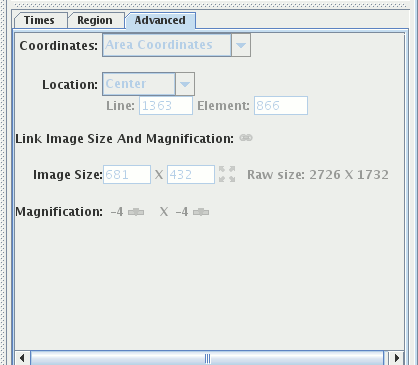
You can specify the placement point of the image (e.g., Center, Upper Left) and its location. Location can either be specified as an Line/Element Area coordinate or as Latitude/Longitude. Use the cycle buttons to select the type of location to use.
The map button, ![]() will list the various center and corner locations
of the different available map views. This allows you to choose a lat/lon position.
will list the various center and corner locations
of the different available map views. This allows you to choose a lat/lon position.
Image size and magnification can also be set. Click on the slider icon to change the values.
The linked button ( ), when selected, will automatically change the image size
as the magnification is changed.
The Full Resolution button  allows you to set the magnifcation,
image size and position to be the full image resolution.