


In this exercise we'll display the Level III radar images from the ADDE server for the super cell area that we loaded in the previous exercise.
View Window
by selecting the
File→New→View Window→Map Display→One Pane menu.
By default, the IDV will load data into the currently
selected View Window.
Minimize the other window with the satellite image in it for now.
Data Choosers.  .
Click on the
.
Click on the Radar node under Sat & Radar branch,
then select the ADDE Level III tab.Server: selector, choose
adde.ucar.edu.
In the Dataset: selector, choose
CCS039R. If either of these is
not in the list, just type them in. When you have made
your selections, click the Connect
button.Radar Data Type: selector, choose
the Base Reflectivity Tilt 1 type.Absolute times radio button.
With this option selected, the server is queried for a set of
available times for that type and these are listed in the
Times: panel.
1998-06-29 21:00:00Z
through 1998-06-29 21:59:00Z.Data Type:
is set to Reflectivity. Make sure
the Create display option is checked, and then
click the Add Source button.Default Background Maps Control.
Turn on the
North & Central America maps.
the US Interstate Highways maps.
Make sure all other maps are off. When you are finished,
go back to the View Window.Displays→Locations→US→U.S. Cities menu to
overlay some place names. Change the display to show
the locations using a custom layout by using
the display control's Layout Model
radio button in the control.
Displays→Special→Range Rings menu.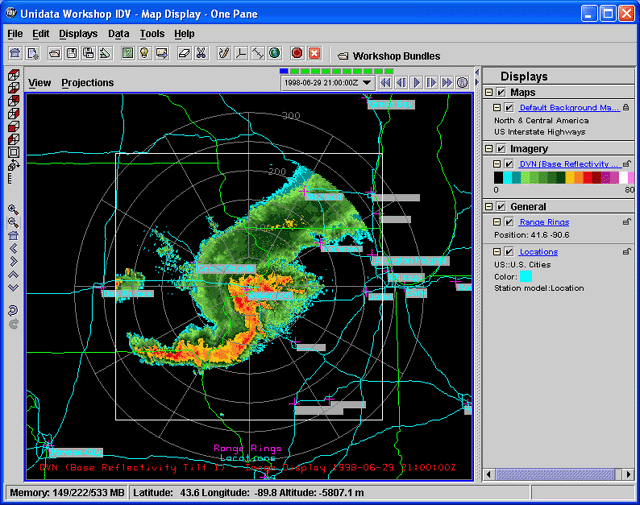
Time Animation Properties dialog
in the satellite view window.
Change the Share Times option to None
and click the OK button.
X in the upper
right corner of the window.