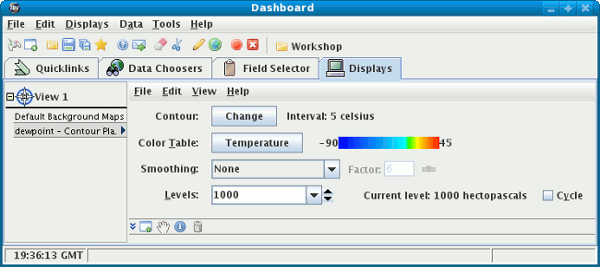


Display Control Window is a panel or window
with menus, buttons, sliders, and other widgets to control a display.
When a display is first created its display control is added
to the Dashboard or pops up in a separate window depending
on your configuration. The control also has a legend shown in the
View Window's legend panel.

The menus can be accessed from the menu bar in the control window:

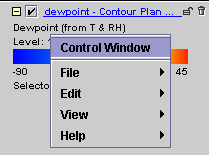
or by right clicking on the legend label:
File Menu
The File menu allows to remove, save or reload
the this control. Each display control may have a different
set of entries under this menu, depending on the type of data
being displayed.
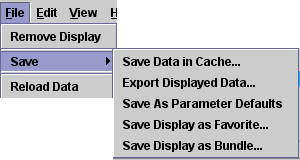
Remove Display
Save→Save Data in Cache...Save→Export Displayed Data...Save→Save as Parameter DefaultsSave→Save Display as Favorite...Save→Save Display as Bundle...Reload Data
Edit Menu
The Edit menu allows you to edit some of
the properties of the display. Each display control may have a different
set of entries (or none) under this menu, depending on the type of data
being displayed.
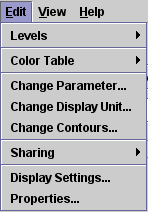
Levels
Color Table
Change Parameter...
Change Display Unit...
Sharing→Sharing OnDisplay Settings...
Properties
Display Control Properties
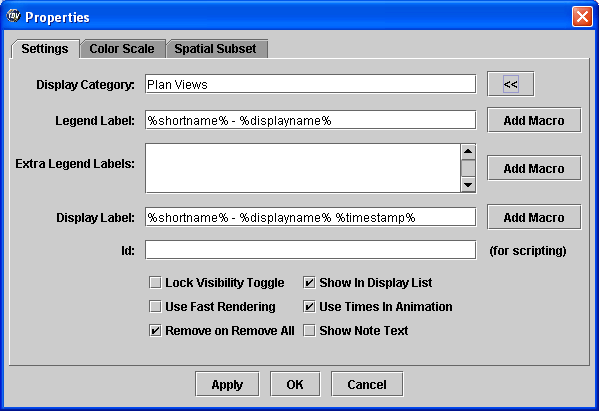
Display Control Properties dialog allows you to change
some of the features of the display and how the control works:
Display Category
Legend Label
Extra Legend Labels
Display Label
You can use the checkboxes in the dialog to change other properties. Some common choices are:
Lock Visibility Toggle
Use Fast Rendering
Remove on Remove All
Show in Display List
Use Times in Animation
Show Note Text
Try these changes:
Display Control Properties dialog. Change the category
to "Derived Parameters" and
then click the OK button. Edit→Properties menu. In the text field,
type "My cool dewpoint display" then click the
OK button. Try different
combinations of the macros to see their effect.Display Control Properties dialog. Highlight and delete
the %displayname% macro in the
Display Label field. Click the Add Macro
button and select the Level macro. Click
the OK button and see the change in the display.Display Control Properties dialog. Select the
Color Scale
tab in the dialog. Check the Visible checkbox,
set the Position to Left, and set
the Label Color to white, then click
the OK button and see the change in the display.View Menu
The View menu allows you to change the
way the view works. Each display control may have a different
set of entries under this menu, depending on the type of data
being displayed.
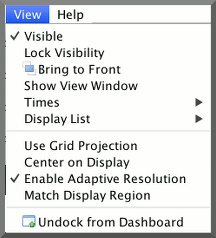
Visible
Times→Use Times in AnimationTimes→Drive Times with this DisplayTimes→Uses Time Driver TimesDisplay List
Bring to Front
Use Data Projection
Enable Adaptive Resolution
Match Display Region
Dock in/Undock from Dashboard
Help Menu
The Help menu allows you to get more
information on using the control and what data is being displayed.

Details...
User's Guide