


12.2 GUI - Displaying A Satellite Image
In this exercise, you will display a satellite image using the GUI.
- Select the Image GUI from the Display Menu.
- Select: Display/Image
The Image Select GUI should come up and look similar to this:
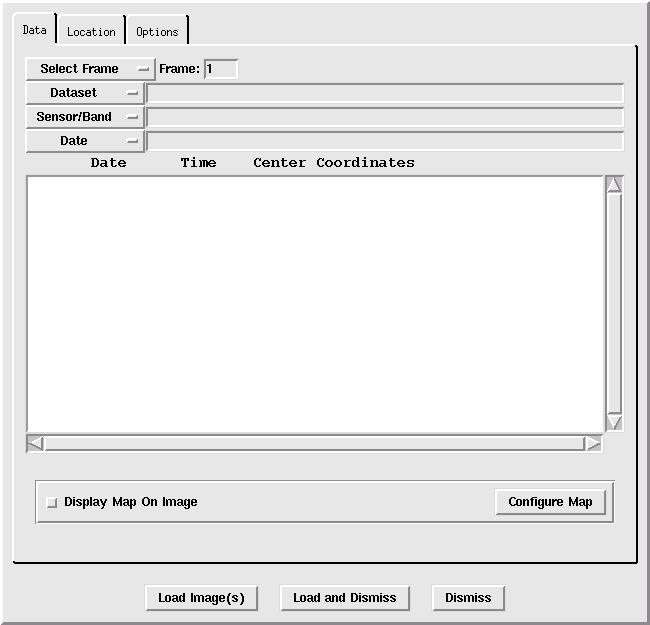
There are four menu buttons that are used to select an image: Select Frame,
Dataset, Sensor/Band, and Date.
- Display the Band 4 Full Disk image from GOES East and display the image on frame 2.
- Select: Select Frame/ALL FRAMES/2
- Select: Dataset/EAST/FD
- Select: Sensor/Band/G-12 IMG/4
- Highlight the most recent image in the list by clicking on its
listing in the white window.
- Select: Load Image(s)
- Display the same image on frame 3, but include a map and display only part of the data.
- Select: Select Frame/ALL FRAMES/3
- Click: Display Map On Image
- Click: Location
The Location tab contains an image of a globe. After selecting an image, the area
of coverage of the image will be displayed on the globe as a yellow box. Once the bounds
are displayed, you can alter the coverage shown by using the left mouse button to
drag the selection bounds, and the middle mouse button to set the latitude and
longitude center point, or by filling in the lat/lon or station ID, and the Line/Ele magnification.
- Use the mouse to select a new data coverage area.
- Click: Load Image(s)
This will load the image, but not exit the Image GUI. Compare the image with the
coverage shown on the Location tab.
- Close the Image Select GUI window.
- Click: Dismiss