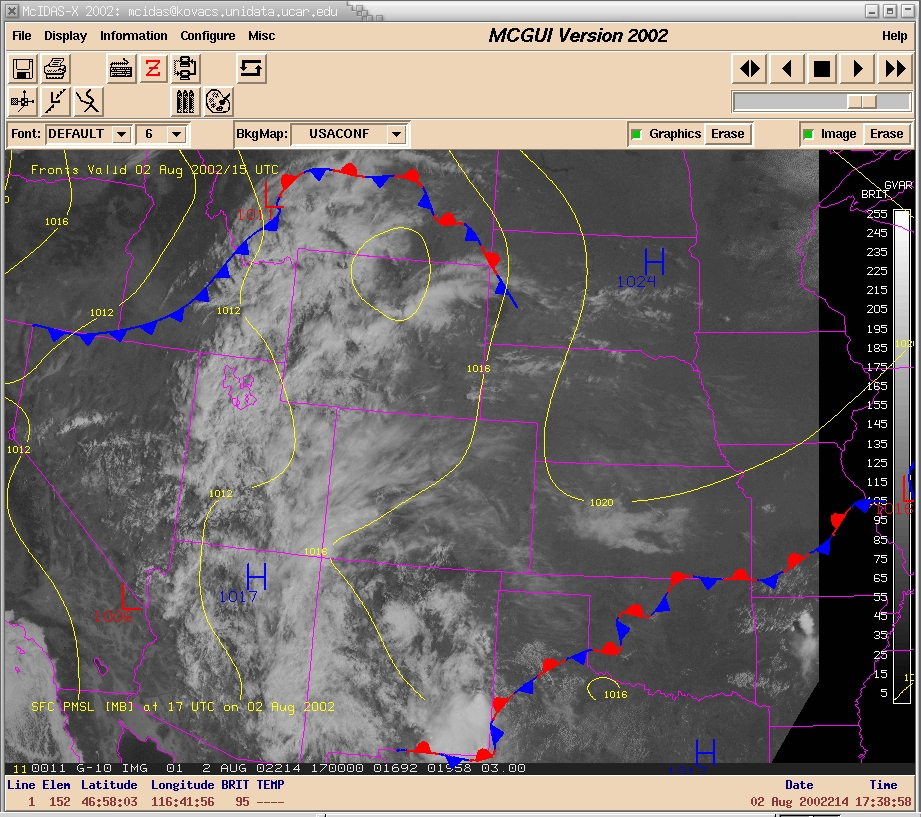


The Unidata Tcl/Tk GUI allows one to access data and execute McIDAS commands using a workstation's mouse and keyboard. A snapshot of the McIDAS-X GUI is shown in:

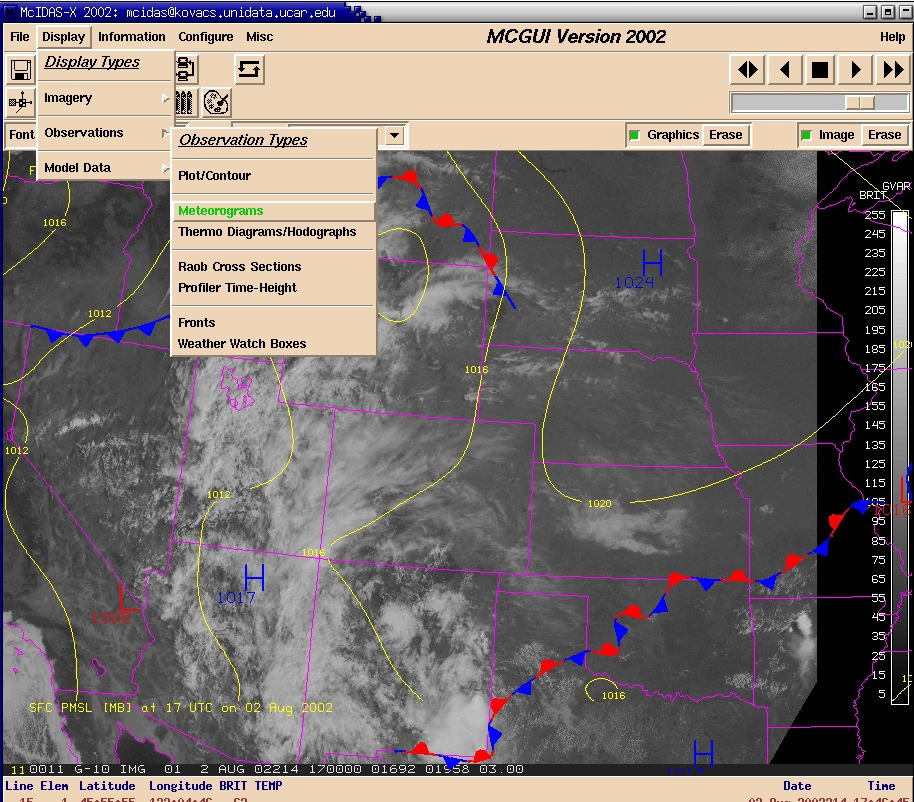
The buttons presented in the GUI tool bar are short cuts to actions available through the drop down menus that are available at the top of the GUI. When drop down menus have drop down menus, they are referred to as cascading menus. A cascade menu can be seen in:
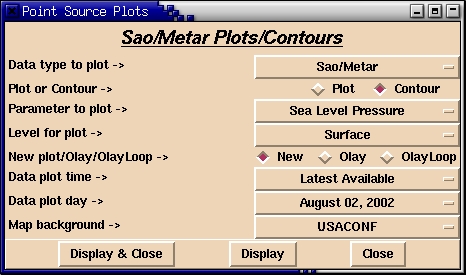
For the life of a McIDAS-X session, the default background map definition is saved in the McIDAS string table in the string ?BKGMAP. The map line segments for the map are also saved in the VIRTual graphic file VIRT9300. When you produce a plot or contour out of the GUI and select the default background map, the McIDAS commands that produce the display use the string definition to create the plot and the VIRTual graphic file is restored to the frame.
The map definitions for the default background map are defined in the McIDAS BATCH file BKGMAP.BAT. You can add your own map definitions to this file if you want to (more on this later).
The default background map concept is not limited to simple geographic maps. We distribute Unidata McIDAS with a set of TOPOgraphic images that can be used as background maps as well. These are available through the Images cascade accessible from the Observations drop down menu.
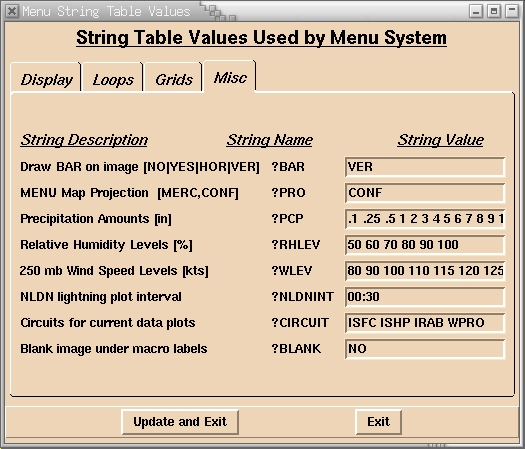
There are other strings that you can manipulate to customize your plots through the Modify GUI Parameters action. For example, you can control whether or not a data bar is displayed on images and whether it is displayed vertically or horizontally (?BAR string). You can change the interval over which lightning data is plotted (?NLDNINT). The interface presented for modifying GUI parameters is shown in:
Information on current grid, point and satellite information is displayed using the Data Availability cascade of the Information drop down menu. For example, you can access information on the current point source data (surface, upper air, lightning, etc.), gridded data (NGM, MRF), satellite and radar imagery available on your system through this menu. The values listed are retrieved from the System Key table.
There are three ways that you can start the Unidata GUI, but the way you start it will determine how many windows are displayed during the McIDAS-X session and how cleanly the session can be exited.
Starting the GUI from an active session
If you already have an active McIDAS-X session running, you can start the Unidata GUI by typing MCGUI from the McIDAS command input window. This will cause the reparenting of the McIDAS image window as a child of the GUI, but it will leave the command input window separate.
This method for starting the Unidata GUI is not recommended.
Configuring .mcidasrc and running mcidas
McIDAS-X users can customize their McIDAS sessions by modifying various entries in the .mcidasrc configuration file that is created for them in their HOME directory the first time that McIDAS is started. For more information on using .mcidasrc to configure sessions please refer to Configuring McIDAS-X Sessions with .mcidasrc.
If you wish to have the Unidata GUI started automatically when you start McIDAS by typing mcidas at the Unix command prompt, you should uncomment the line in .mcidasrc that looks like:
Unidata GUI vs SSEC GUIThere is also a commented entry in .mcidasrc that is used to automatically start the SSEC-provided GUI to McIDAS-X:
|
The .mcidasrc method for starting the GUI is nearly identical to running MCGUI from the McIDAS command input window. The only real difference is that this method runs MCGUI for you automatically.
This method for starting the Unidata GUI is also not recommended.
Running mcstart to start McIDAS-X and the GUI
The recommended way to start McIDAS-X and the Unidata GUI is to use the Tcl/Tk mcstart interface. You do this by typing mcidas config at the Unix command prompt to start a session.
A subset of the configuration options you set in .mcidasrc will be presented to you graphically as is illustrated in:
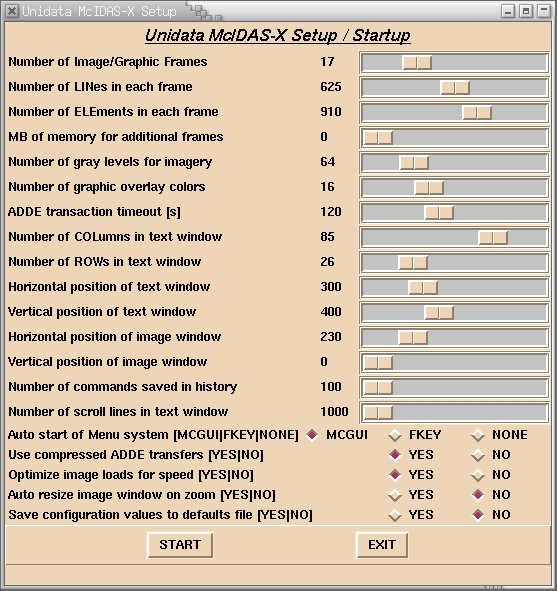
By interacting with the various scales, you can change things like how many frames of what size are to be used in your session, how much extra memory to set aside so new frames can be created on-the-fly, the number of gray levels to be used for image display, etc.
Through the set of three radiobuttons near the bottom, you can choose whether to start the Unidata GUI, the Unidata F-Key Menu, or nothing when the McIDAS-X session is started.
The values and options presented to you through the mcstart interface are those that you have specified in your .mcidasrc file. To change the values as they are presented, you will need to edit .mcidasrc and set the appropriate values.
The major difference in how the McIDAS-X session is started by mcstart is that the McIDAS command input window is not automatically started. This helps curb the screen clutter that can result from the other methods of starting McIDAS-X.
This is the recommended way of starting McIDAS-X.
Exiting the GUI and McIDAS-X
The standard method for exiting a McIDAS-X session is by typing EXIT in the McIDAS command input window. For the first two methods of starting the Unidata GUI presented above, this will result in both McIDAS-X and the GUI exiting, but a warning/error will be omitted that you will need respond to.
To exit the Unidata GUI when started by the third method above, you can either select the Exit action from the File drop down menu, or you can type EXIT from a GUI command input window. Typing EXIT from the McIDAS command input window will only result in that window going away; McIDAS-X and the Unidata GUI will continue to run.