

| 4.3.0 | Time Animation Widget |
| 4.3.1 | Time Animation Properties Dialog |
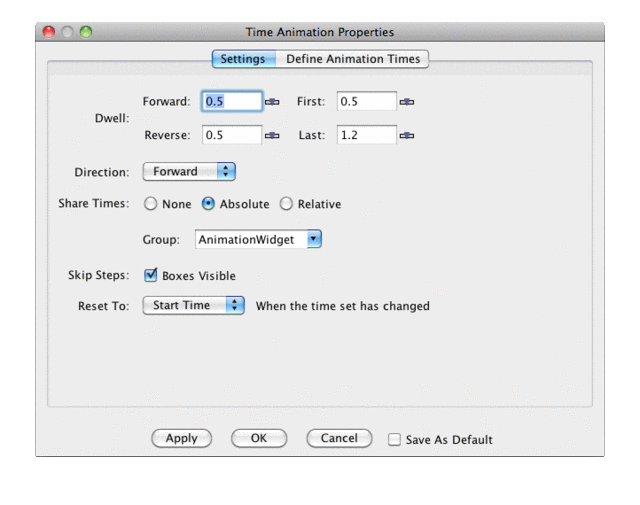
| 4.3.2 | Settings Tab |
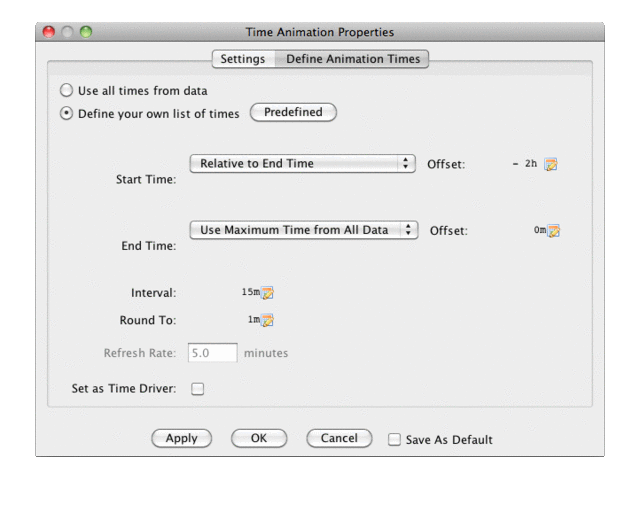
| 4.3.3 | Define Animation Times Tab |

 in the
animation controls to see the Time Animation Properties Dialog box.
This dialog has two tabs.

Apply or OK you will set the properties
in the Animation Widget. If you have the Save As Default button
checked then the properties will be saved off and used every time a new Animation
Widget is created. For example, you may find that you are always setting the
dwell rate to a particular value. You can save that state off as the default
state for all Animation Widgets that are subsequently created, both in the current
run of the IDV and in future runs.
The Dwell controls how fast the animation occurs.
Click on the slider icon:  to change the values.
Values are seconds/frame.
Direction menu.
Share Times button.
See here for more information.
Check Boxes Visible to show the boxes in the Time Animation Widget.
The time boxes allow you to configure which frames will be disabled in the Time Animation Widget.
This behaves the same as the boxes in the main widget.
You can also set the behavior for when the set of times available changes
with the Reset->To menu. The options are the Start Time, End Time, or No Change.

Define your own list of times button.
You define how to determine the start time, end time and a
time interval. The Interval is used to create the set of time steps (inclusive) between the start and
end times.
The start time and end time modes are determined one of four ways:
Use First/Last Time from Data This takes the time from the data that is being
displayed.
Current Time (Now) This automatically updates the animation time set
to use the current clock time. This is useful for animation of real time data. If you select
this option you can then define how often the animation set is updated with the
Refresh Rate field. The Round To field allows you to specify
a rounding factor.
Fixed This mode allows to you to specify a fixed date/time.
Relative to End/Start time This mode uses the other time
as the base time. For example, you could set the end time to be the Current Time. And
set the start time to be relative to the end time minus 1 hour (using the start time
offset field). Note: you cannot have start and end times both be relative to one another.
 button. When you do this the
 Offset Dialog will be shown:

If you check the Set as Time Driver checkbox, the times that you
set are used as the Time Driver times. You can then load in data to match to
these times. See the Field Selector
section for more information.
By pressing the Apply button, you can apply the changes that
you have made. This is also a good way to see if there are any errors.
For example, the end time cannot be less than the start time.